Getting started
The model is a mathematical formulation of a linear programming. Ith can be solved with different solvers: CPLEX, Gurobi, GLPSOL, etc. The model was originally developed in AMPL. Running the model in AMPL requires the licences of AMPL and of at least one LP solver.
However, the following version was tailored to be executed with GLPK [1], an open source model.
How to install and run the model with GLPK:
The model is coded in GLPK, using the open-source solver GLPSOL. To run the model, perform the following 4 steps: install the solver, download the code, execute the code and enjoy the results.
Install GLPK:
a) on Mac OS X (Option 1, recommended): use homebrew http://arnab-deka.com/posts/2010/02/installing-glpk-on-a-mac/
b) on Mac Os X (Option 2)/Linux: - Download the latest version of GLPK from: http://www.gnu.org/software/glpk/#downloading - Install GLPK from the command line
$ cd ~/Downloads $ tar -xzf glpk-4.63.tar.gz $ cd glpk-4.63 [or newer version] $ ./configure –prefix=/usr/local $ make $ sudo make install
See if your system recognises it:
$ which glpsol
should reveal:
$ /usr/local/bin/glpsol
Now try:
$ glpsol –help
Source: http://hichenwang.blogspot.ch/2011/08/fw-installing-glpk-on-mac.html
on Windows:
Download the source files from: https://sourceforge.net/projects/winglpk/files/latest/download
- Extract the files in a folder. Depending on your operating system use glpsol.exe from:
./w64 if running on a 64 bit version
./w32 if running on a 32 bit version
For facilitating the access to glpsol.exe you can add the full path (depending on your operating system, see below) from the previous point to the system variables PATH
Clone/download the content of this folder
Navigate to the folder ‘STEP_2_Energy_Model’ folder via terminal/cmd prompt and execute (check glpsol documentation for more options):
$ glpsol -m ESTD_model.mod -d ESTD_data.dat -d ESTD_12TD.dat -o ESTD_output.out (You might need to use ‘glspol.exe’ instead of ‘glpsol’ on Windows)
4. Check the output files: if the ESTD_main.out file is correctly generated. If the command at point (3) did not run, it might be that glpsol is not on your PATH. Two solutions for that: - (not best) instead of “glpsol” use the full path, e.g. on Mac ‘/usr/local/bin/glpsol -m ESTD_model.mod -d ESTD_data.dat -d ESTD_12TD.dat -o ESTD_output.out’ - (best) add the folder in which glpsol is installed to the PATH. e.g. on Windows 7 (http://geekswithblogs.net/renso/archive/2009/10/21/how-to-set-the-windows-path-in-windows-7.aspx). on mac (from terminal) ‘export PATH=/usr/local/bin:$PATH’ (if glpsol is installed in /usr/local/bin)
Descriptions of outputs files and folders:
./assets.txt : Installed capacity of each technology and its specific cost, gwp…
./cost_breakdown.txt : Cost of resources and technologies.
./gwp_breakdown.txt : GWP of resources and technologies.
./losses.txt : Losses in the networks.
./hourly_data/ : Folder containing the hourly data for each layer and for each storage technology.
./sankey/ : Folder containing the SANKEY diagram.
To open the Sankey diagram, open the ESTD_sankey.html file. The browser should indicate the following figure:
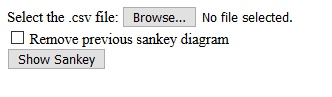
Click on the Browse button and select the Sankey file input2sankey. Finally, click on the Show Sankey button.
How to install and run the model with AMPL:
Compared to GLPK files, AMPL uses an extra file with solver options. Moreover, there are 2 syntax changes: (i) in the data files, AMPL uses ‘Infinity’ to define unbounded numerical values and (ii) in the model files, the resolution and output writting must be moved in the new file.
For sake of simplicity, only the GLPK version is provided in this repository.
Exercices:
Exercice 1 - analyse the system
Caution
TO BE DONE